Free cat tree plans that are worth using are hard to find. When you are wanting to build a cat tree you don’t want the hassle of sorting thru site after spammy site to find something that looks good and is within your skill range. You just want something nice for kitty!
That’s where we come in. We’ll do the painful sorting and sifting. Then present what we feel are the best cat tree plans and ideas here for your consideration. So you can decide what fits best into your home, with your budget and your cat’s needs in mind.
Now, we’re not saying every bit of pet furniture you’ll find here is a work of art. But we know that beauty is in the eye of the beholder and quite often function trumps fashion, at least in the short term.
This list of free cat tree ideas always growing so check back often.
Free Cat Tree Plan… Beer Box Cat Tower
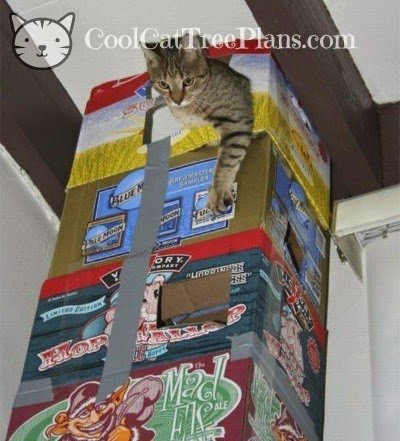
Our first plan is the stereotypical free to make cat tower. Yes, it’s a stack of boxes, beer boxes no less, held together with that magical sticky stuff…. Duct Tape!
Perhaps not the thing Martha Stewart fans are looking for in cat furniture. But it will get the job done and except for the cost of the duct tape the materials are certainly free.
If you don’t personally generate enough beer cases to build a floor to ceiling cat tree I’m sure your local frat house or the corner pub will be willing to part with some of theirs.
If you are going to build this type of tower for your kitties you will NEED TO SECURE IT to a wall, the ceiling or something like a basement post to keep your cats safe.
Because left on it’s own such a light weight tower will fall over once your cat starts climbing it. But you didn’t need that warning did you?
If You DO Want To Make A Beautiful Heirloom Work Of Art For Your Cats & Your Home We Suggest You Take A Look At These ===>> Professional Woodworking Plans & Instructions!
Unique Free Cat Tree Plans: Build A Cat Tree Ladder
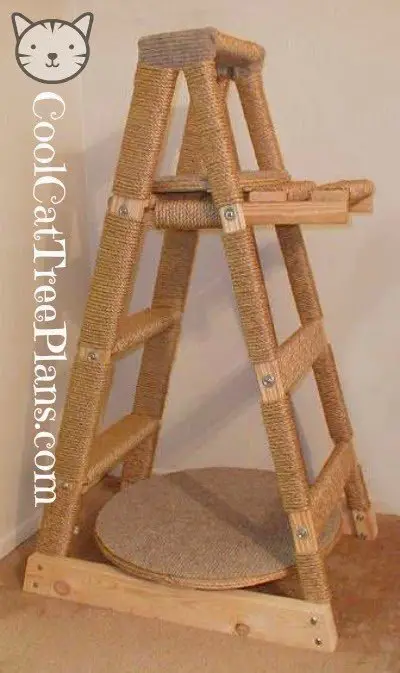
Next up we have a free cat tree made from something you’ve likely got sitting around your house already. A ladder!
Now I have to warn you, with the price of wooden ladders these days, if you don’t already have an old ladder laying around in want of a job this project will likely cost you more than getting a cat tree shipped to your door ready made from Amazon.
That being said, it IS a cool project and having this in your living room would definitely be a conversation starter.
Making this cat tree is pretty self-explanatory. Get yourself a ladder, a roll or two or FOUR of sisal rope, some glue, and start a-wrappin! We highly recommend you use screws at the start and finish of each rope and a plentiful amount of glue along the way. We’ve seen folks use both woodworking glue or high heat hot glue to good effect.
In the photo above sections of 1/2 wood board have been used to stabilize the base and discs of carpet-covered plywood have been added top and bottom to make platforms for kitty antics. There is even plenty of room to attach a condo and cat hammock if you are so inclined.
Free Cat Condo Plan: Make A Recycled Litter Pail Cat Condo
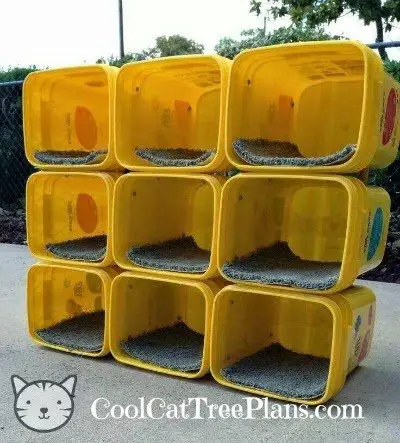
Here we have a twofer. It gives you something to do with all those cat litter pails (I mean seriously, how many do you need laying around?) and gives your cats a comfy place to hang out even outside!
This cat furniture solution certainly fits the bill for FREE but it does take a bit more “doing” than the previous two options.
You will need a power drill to make your holes and some hardware to fasten them together securely. I have seen some folks out there saying you can glue these pails together. But I don’t recommend it.
Though a little more involved, bolting something like this together will more be solid, permanent and safe.
Most folks will have the stuff needed for this project gathering dust in their homes already but if you don’t they won’t break the bank. Nuts, bolts and washers at your local hardware store are to be had for pennies each.
And a cordless drill to get the job done won’t cost much or you could borrow one. And almost everyone has a ruler or tape measure of some sort available.
Depending on how high you build your pail tower you may want to anchor it to something like a wall or a fence. Just to be safe.
Free Cat Tree Plans…
How To Make A 4 Perch Cat Tree
Adapted from the Furr Angels! and Cats Haven web sites. Originally published in the June/July 1994 issue of PETA’s Animal Times. PETA materials are not copyrighted and may be distributed freely.
Okie dokie, here are instructions for building the cat tree you see right here. It’s not too hard to do and shouldn’t stress your woodworking skills too much. When it’s done it’ll be about 2 feet wide, 2 feet deep and between 4 and 6 feet tall.
Depending on what you like you can add upholstery, batting, carpet and/or sisal rope to finish your cat tree. In these plans, upholstery and batting are recommended where carpet might normally be used.
This is because cats scratch the carpet to pieces and then eat the pieces. (Bad for kitty cause CARPET AIN’T FOOD!) And even if they don’t actually eat the torn off carpet bits it leaves a ragged, bare patch that’s difficult to replace.
So, a heavy upholstery material and poly batting are suggested for the perches, shelf and base. BONUS: coverings like these can be easily changed out when worn or if you change your home decor.
However, if you really like carpet and your cats really like carpet then by all means use carpet! That’s one of the perks of making your own cat tree after all.
For structural stability and usability, 1×2 supports are used at the tops of the posts, a support shelf is present in the middle of the tree, 2×4’s were used instead of 4×4’s, and two bolts were used per post instead of one. Also note that the bolts holding the posts to the base are recessed so the cat tree doesn’t gouge your floors.
Materials List
- Perches – one 22″ length of 12″ Sono tube cut lengthwise into three curved sections.
- Posts – two 8’x2″x4″ pieces of lumber, each piece cut into 4′-6″, 2′-9″, and 9″ lengths.
- Supports – three 19″ lengths of 1″x2″ pieces of lumber (to span the posts at the top beneath the perches), and two 13″ lengths to attach the Support Perch.
- Support Shelf Perch – One 19″x13″ piece of plywood, to span between posts (to act as a stabilizer) Base – two 2’x2′ pieces of 3/4″ plywood.
- Hardware – twelve 1/4″ x 3-1/2″ lag bolts, twelve flat washers selected to fit the bolts, heavy wire brad staples, staples (for staple gun), and twenty 1-1/2″ wood screws.
- Fabric and batting – four 26″ squares, and one 34″ square in the cat’s choice of color.
- Misc. – 500′ of 3/8″ sisal rope (ten 50′ packs), wood glue, and 3″ long nails. Tools – drill, screw driver, hammer, staple gun, wood clamps, measuring tape, pencil.
Alternative: Eliminate the need for lumber and sisal rope by using clean, solid, bark-covered tree limbs or trunks approx. 4″ diameter, cut to specified lengths. (This will make a rustic cat tree or at least a give your carpeted cat tree a more rustic appearance. Remember tree trunks and branches can be added to ANY cat tree plans to make them more rustic looking)
Directions For Building Your Cat Tree…
First, prepare posts and base:
Post Assemblies:
Cut the 2×4’s into 4′-6″, 2′-9″, and 9″ pieces (2 of each size).
Drill two holes in the bottoms of each length of wood, using a template (see base instructions).
Attach the 19″ long support 1x’s between the top ends of each pair of posts, spanning the posts like a beam. Attach the 9″ pieces together, and the 2′-9″ pieces, and then the 4′-6″ pieces. Use nails to fasten these pieces. Put them between the posts, not on top of them.
Assemble the Base:
Glue the 2’x2′ pieces of 3/4″ plywood together to form one 2’x2’x1-1/2″ base.
After the glue dries, drill six holes along two opposing sides of the base about 2″ from the edge. An easy way to do this is to draw a template on the underside of the plywood base.
Draw a rectangle 1-1/2″x 3-1/2″ (the actual size of a 2%u21224) just 1″ from each edge of the base in the corner, and repeat for each corner. Then draw a rectangle 1″ from the edge in the middle of the base, and repeat for each side. You will have three rectangles in a row along each side of the base, 1″ from the base edge, as shown below. Place two marks inside each 2×4 for the bolt holes.
Countersink the holes with a 1″ drill bit. This will allow the bolt heads and washers to be recessed into the wood, so you don’t scratch any floors.
Cover the top surface of the base with the 34″ square of fabric, by centering the base on the overturned square of carpet, wrapping the edges of the carpet around the sides of the base, and securing the fabric with staples tacked through the under side only.
Assemble the posts and base:
Attach posts to base with the 3-1/2″ lag bolts. Insert a bolt through a washer first, and attach the 9″ post assembly in the front. Then attach the 2′-9″ post assembly in the middle, and finally the 4′-6″ post assembly in the rear. This forms a ramp the cats can run up.
Do not completely tighten the bolts yet. Bring them close to tight, then back them off a bit.
Attach the Support shelf Perch:
Stand the tree upright. Clamp a 13″ 1×2 between the 2′-9″ and the 4′-6″ posts, one on each side, on the inside of the posts. Be sure the base bolts are loose, so the posts are free to align themselves properly. Place the top of the 1×2 supports 21″ above the base, and level them.
With these shelf supports clamped in place, place the 13″x19″ shelf perch on them. It should lay flat, and not wobble. Adjust the clamps and support 1×2’s until the shelf lays flat.
Once the shelf is laying flat, remove it and attach the 1×2’s to the posts more permanently. While still clamped in place, screw them to the posts with the 1-1/2″ wood screws (two per post). Then remove the clamps. (A screwdriver clutch drill attachment makes this easy work.)
Now screw the 13″x19″ shelf to the 1×2 supports. Use three screws per side.
Now tighten the base lag bolts.
Attach the Perches:
Cut the 12″ diameter Sono Tube (available in the Concrete Formwork section of the hardware store) into thirds lengthwise, to form three curved sections 22″ long.
Place one section on top of a post assembly. Screw it in place using the wood screws. Put two screws in each 2×4 post. Repeat for each perch.
Cover each curved section of tube with poly batting and a 24″ square of fabric, placing seams on the the under sides of the perches, attaching the fabric with staples. Also cover the Shelf Perch with batting and fabric, stapling to the underside of the shelf.
Wrap the Posts with Sisal Rope:
Start at the base of the post, and use heavy wire brads and a hammer. Fasten the rope to the bottom of the post, and begin wrapping. Every 6 or 8 winds, tamp the rope down with a hammer. Fasten the rope in the back of the 2×4’s only, so the fasteners don’t show.
At the shelf perch, we cut small sections of rope and attached them individually around the 1×2 shelf supports. Then we continued winding after we passed the shelf. One 50′ pack of 3/8″ sisal rope will wrap about 20″ of 2×4.
PRO TIP… Don’t Recreate The Wheel!
Want to build your own dazzling pet furniture but need a bit more hand holding or options than we’re able to offer here? We have just what you need (including 150 woodworking lessons that’ll have folks thinking you have Woodworking Super Powers! Check out this short video… RIGHT HERE!
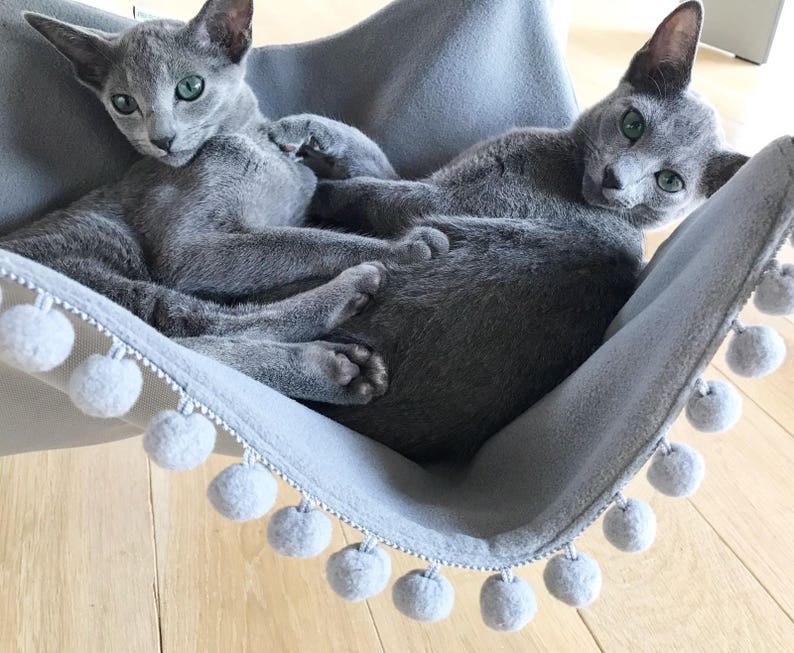
Homemade Cat Hammock For Under Kitchen Chairs
Not exactly a “free cat tree plan” but it’s very cool, out of the way and cats love hammocks. Put them all together and you have one, or more, very happy cats!
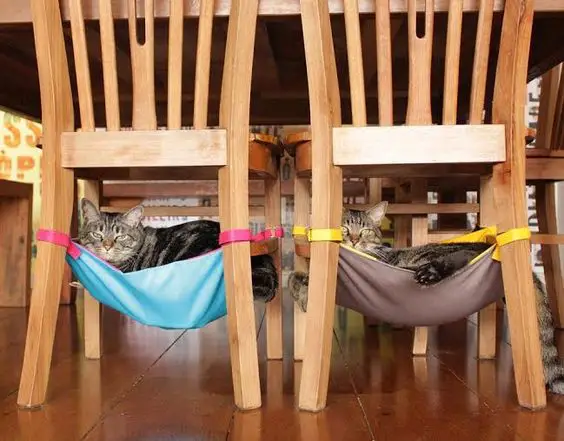
When we saw this we just had to bonk our heads and wonder why we didn’t think of that? Seems so obvious once you see it. Now we know this isn’t exactly a cat condo or something that’ll help you keep your kitty’s get their exercise but naps are important too, right? A square of sturdy fabric of your choice with a double-sided velcro strip attached to each corner will do the trick. Just be sure to get the straps pulled TIGHT or fastened above a support beam if there is one.
DIY Cat House Made From Cardboard Boxes
As free cat tree plans go this one is not pretty but it works and is “modular” as well…
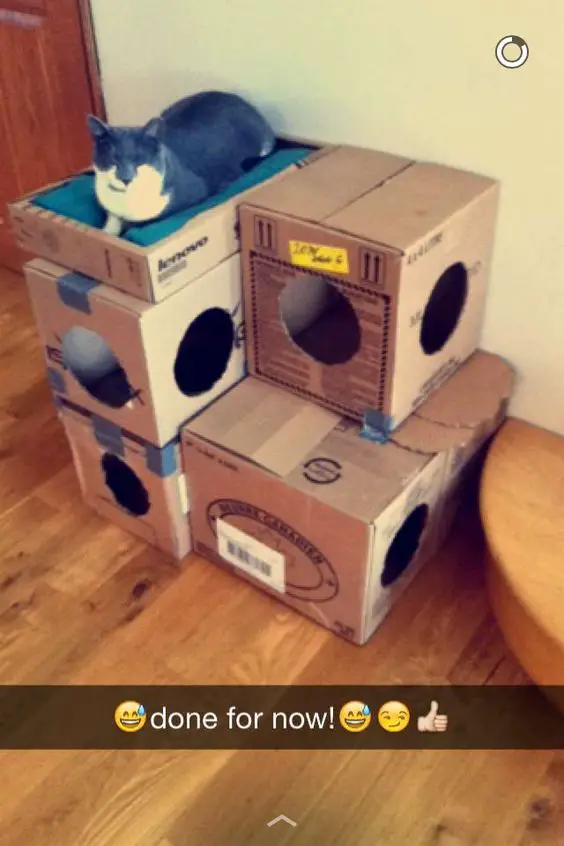
First it was a beer box tower (see above) now it’s boxes of all sorts. Gotta love this “frat boy” ingenuity. Honestly, cardboard boxes are a great way to get your kitty something fun to hang out in quickly and inexpensively. When it comes to free cat tree plans this one nails it.
In fact, we’ve even got a post to show you how to make a cat tower out of cardboard boxes that will be safe and fun for your kitties.
But come on ladies… you know you can do better than this. Get out that contact paper and cover those boxes. Then whip out your cameras and show us how pretty you can make a stack of cardboard boxes. Will your cats care? Heck no! But your mother-in-law just might LOL. And if you like the idea of “Modular Cat Trees” check out these…
Build A Cat Condo From Veggie Crates
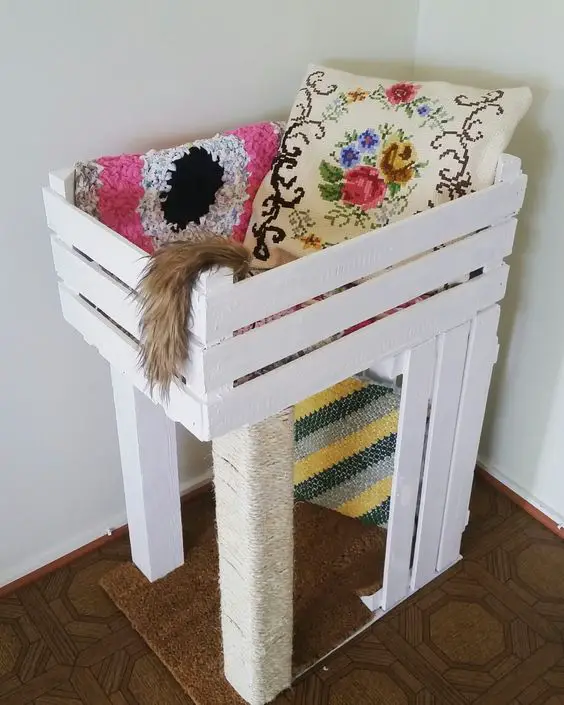
This is a pretty straight forward DIY cat condo to make. We suggest using wood glue along with wood screws to fasten the veggie crates to one another. That will make your structure much more secure and durable. Once your paint is dry you can make it more comfy for your kitties with some colorful pillows or a spiffy fleece throw or two.

The image here is pretty self-explanatory. Just use your common sense and you’ll do fine. A word of caution though. Working with carpet is MUCH harder than you think it will be. Use a really sharp and sturdy utility knife to cut it.
And be sure to pull and trim the edge “fluff” before trying to adhere it to your post. Make sure everything fits the way you want it to BEFORE using any glue. Also, we know they tell you to use spray glue but that doesn’t stick really well (depending on the kind you buy). We recommend you use double sided carpet tape instead. Best of luck to you.
PRO TIP… Don’t Recreate The Wheel!
Want to build your own dazzling pet furniture but need a bit more hand holding or options than we’re able to offer here? We have just what you need (including 150 woodworking lessons that’ll have folks thinking you have Woodworking Super Powers! Check out this short video… RIGHT HERE!
Check back soon for more Free Cat Tree Plans!
(If you have made a cat tree from free materials and would like us to consider featuring it here please send an email to Support AT CoolCatTreePlans DOT com and we’ll see what we can do.)
Follow Our “Best of Cool Cat Tree Plans” Board On Pinterest